
A turning point in World War II remembered
South Africa played a key role in the Battle of El Alamein
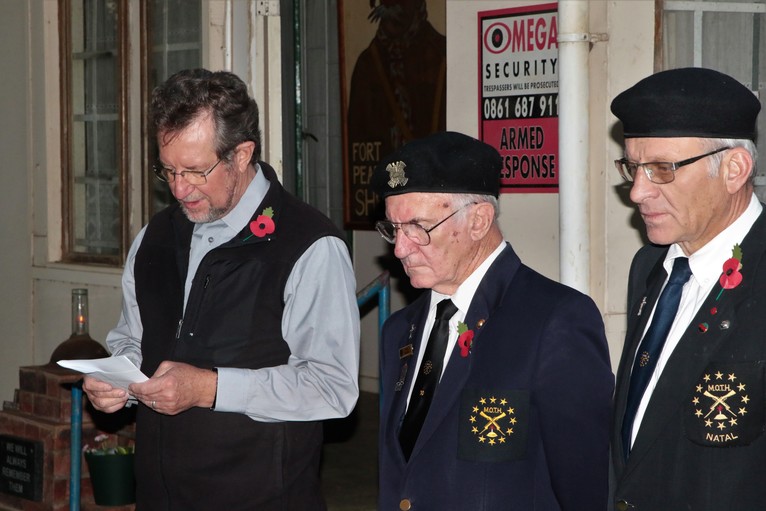
THE Fort Pearson MOTH Shellhole held a parade in honour of those who lost their lives in the Battle of El Alamein on 22 October 1942.
The battle was a turning point for the Allies in World War II and was to the British and Commonwealth forces, what the Battle of Kursk was to the Russians.
South Africa played a key role and it was a battle in which many South African lives were sacrificed in the crucible of war.
To the older generation in South Africa, terms such as the ‘Knightsbridge Box’, the ‘Desert Fox’, the ‘Cauldron’ and the ‘Gazala Gallop’ were common knowledge, as were these words by General Montgomery: ‘General Pienaar, tell your South African Division they have done well’.
These words were a sensation at the time and seen as a national redemption.
Prelude to The Battle of El Alamein
For the South Africans, the 2nd battle of El Alamein needs to be looked in context of the Battle of Sidi Rezegh, the Battle of Gazala, the Surrender of Tobruk and the 1st Battle of El Alamein.
The Battle of Sidi Rezegh in November 1941 saw the 1st South African Division’s 5th Brigade fight themselves down, literally to the last man to lessen the impact of Rommel’s drive and help save the day for the British to fight another day.
For the 1st South African Division this outstanding action in the field was added to by the Battle of Gazala in March 1942, where they defended the Gazala line, West of Tobruk.
The task of defending Tobruk was left to the 2nd South African Infantry Division under General Klopper.
An energised and re-armed General Erwin Rommel, the ‘Desert Fox’, advanced on Egypt (and Tobruk) in May 1942, their mission was to take the Suez Canal and cut Britain off from her vast empire (and resources) in the Middle East, India and the Far East
British defeats
Rommel’s armoured advance hit the Allied’s ‘Gazala line’, then headed south and swept past the British 7th Armoured Division and headed back north behind the Gazala line.
The Allied forces reeled and re-deployed catching up with Rommel’s forces in an area known as ‘The Cauldron’ situated between Bir Hakeim and Tobruk.
Three days of armoured fighting ensued in the area of ‘the Cauldron’ and Rommel applied pressure ultimately destroying the Allied defence.
Rommel’s Axis forces then continued to push east to Egypt and forced the British Guards Brigade to withdraw from the Knightsbridge Box on the Gazala Line back to the Tobruk perimeter.
Now on the back foot, on 14 June, the British command authorised the withdrawal of all units from the Gazala line, and thus began the ‘Gazala Gallop,’ a very hasty retreat.
The 1st South African Division was ordered to withdraw along the coastal road back towards Tobruk.
They withdrew to series of defensive boxes and actions at Williams Post, Best Post, ‘Point 187,’ Commonwealth Keep and then Acroma.
The 21st and 15th Panzer attacks forced the 1st SA Division to fight a rear-guard action and to withdraw through each of the respective boxes.
Chased by Rommel’s tanks and driving east, the 1st South African division was now spread out between the original Gazala defences and Tobruk trying to make their way east.
British retreat
By 15 June 1942, the British and Commonwealth forces had started the ‘Gazala Gallop’ in earnest and withdrew to a new defensive line further east on the Egyptian border at an insignificant railway siding called El Alamein.
This was to be the ‘Last Stand’ by the British and Commonwealth Forces, behind El Alamein lay Rommel’s prize – Egypt.
However, this left Tobruk and the 2nd South African Division defending it isolated and highly vulnerable to Rommel’s advance.
The South African 2nd Division defending Tobruk was overtaken by Rommel’s rapid advance, the defences were in a poor state when the South Africans were tasked with defending it and they were ‘on their own’ without air support given the rapid withdrawal of British and Commonwealth forces from the Gazala line.
This did not stop searing criticism from the British Command and especially Churchill who would go on to refer as South Africa’s capitulation at Tobruk as a ‘disgrace’ and his ‘lowest moment’ in the war.
The Fall of Tobruk opened Rommel to the Suez and therefore left Britain’s war and her entire empire in the balance.
2nd Battle of El Alamein
Outraged by the conduct of the war in the Middle East, Churchill headed off to Egypt in August 1942 to make some sweeping changes to British Command.
South Africa played a role in advising Churchill on changes to Command and the entire strategy of the war going forward.
In August 1942, General Smuts was requested to meet Churchill in Cairo, where they decided on a new war strategy.
General Montgomery was appointed to lead the 8th Army.
He set about on a massive troop and equipment build-up with extensive training and morale boosting speeches.
British and Commonwealth forces trained intensively in minefield clearance in preparation for the Second Battle of El Alamein.
The 1st South African Division played a spearhead role on the opening of the 2nd Battle of El Alamein.
The South Africans were tasked to attack on a two-brigade front to secure the southern end of Mieiriya Ridge.
The Indian 4th and Northumbrian 50th Divisions were deployed to their south and to the north was the 2nd New Zealand Division.
A 25-pounder gun firing during the British night artillery barrage opened Second Battle of El Alamein on 23 October 1942.
Throughout the night of 23 October, stretcher-bearers worked under heavy enemy fire, tending to the wounded and evacuating them from the battlefield.
Amongst these the Black Native Military Corps (NMC), non-combatant medics, was Lucas Majozi who went on to win a Distinguished Conduct Medal (DCM) for gallantry.
By 8am the following morning on 24 October the South African objective, Miteiriya Ridge was finally secured.
The South African sacrifice in taking Miteiriya Ridge, spurred General Montgomery to send his now famous congratulatory signal on 24 October 1942, ‘General Pienaar, tell your South African Division they have done well’, to General Dan Pienaar acknowledging that the 1 SA Division had met all its objectives set for the Battle of Alamein.
Acknowledgment : Peter Dickens